Development setup instructions
Prerequisites
If you are building in the app for prototyping, testing, or demo purposes, you can freely build locally for Android without requesting access or keys.
You can also consider using our codespaces setup to get up and running quickly.
Access
- You have been fully onboarding into the VA Github organiztion.
- An SSH key setup with github: Connect With SSH.
- You or your team has been approved to build and release a production feature into the VA Mobile App by a VA Product Owner.
- If your feature is approved, reach out to Flagship support to get access to App Store Connect so you can build the iOS app locally.
Software
Environment variables setup
If you are using zsh on Mac you will need to create the .zprofile and .zshrc files if they do not exists.
In your bash_profile or .zprofile add the following (updated JAVA_HOME with your Java version after the installation above):
# JAVA_HOME` variable pointing to the java installed above example
export JAVA_HOME=$(/usr/libexec/java_home -v 23.0.2)

# `NODE_OPTIONS` this is to manage the node memory space
export NODE_OPTIONS=--max_old_space_size=8192

# Android specific vars for the ANDROID_HOME, platform-tools and cmdline-tools
export ANDROID_SDK=/Users/(your user folder)/Library/Android/sdk
export ANDROID_HOME=$ANDROID_SDK
export PATH=$PATH:$ANDROID_HOME/cmdline-tools/latest/bin
export PATH=$PATH:$ANDROID_HOME/platform-tools

# The build of the app relies on a scripted creation of the .env
# file to run correctly. You will need to add the `APP_CLIENT_SECRET`
# var to work correctly:
export APP_CLIENT_SECRET='client secret ask for this client key'

# The app has a demo mode. To use demo mode the app reads the
# `DEMO_PASSWORD` var. You can set this to a blank password or
# assign any string to it

export DEMO_PASSWORD=''
After adding the variables, restart your terminal window and the variables should be activated. Run which adb to make sure the android variables are working. If they are not, please reach out to Flagship support.
Local project setup
- Verify you have access to the Firebase console. If you don't, please reach out to Flagship support.
- With your preferred code editor, navigate to the
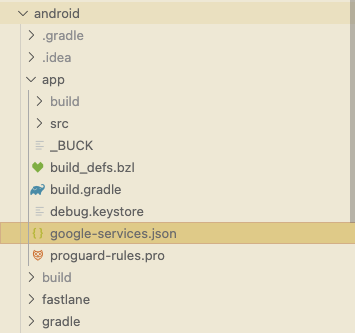
va-mobile-app/VAMobilefolder inside your cloned version of the repository. - In the
android/appdirectory add a file namedgoogle-services.json. You can download thisgoogle-services.jsonfile from the firebase console, under the "your apps" section. You can also download the correspondingGoogleService-Info.plistfile you will need to later place in your inVAMobile/ios.
Download the files from Firebase
Android
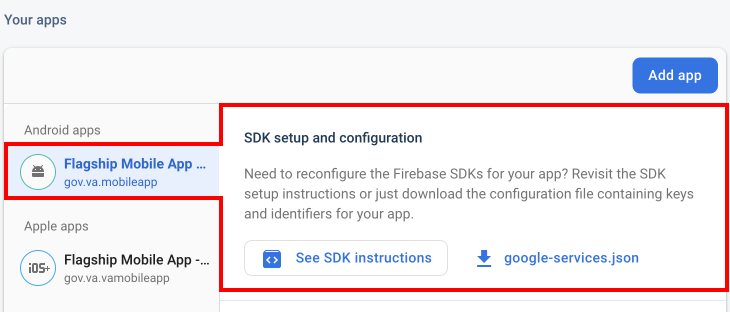
iOS

Add file to proper directory
-
Open a terminal and type
nvm useand press enter to set the node version for the project (if the version isn't installed, it will prompt you with the install command). -
In a terminal, type
yarnoryarn installand press enter to install the projects dependencies. This will create thenode_modulesfolder. -
After dependencies are installed, type
cd ios && pod install && cd ..and press enter to install pods on iOS (This is done once unless you installed new dependencies that need pods created). -
Choose your environment and run the appropriate command to create the
.envfile:- Staging (default):
yarn env:staging- Points to staging VA APIs - Production:
yarn env:production- Points to production VA APIs - Local:
yarn env:local- Points to local vets-api instance (see Local API Setup)
Verify the
.envfile has the client key and demo password from your.zshrcfile. - Staging (default):
-
Run
yarn bundle:iosand press enter to create the IOS bundle. -
Run
yarn bundle:androidand press enter to create the android bundle. -
Run
yarn startto start the metro development server oryarn start:localfor local API development. (see Local API Setup)
Android Setup
Emulator Setup
-
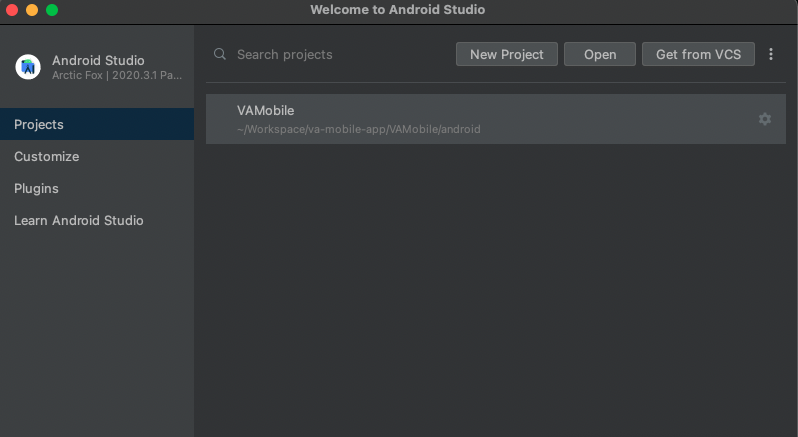
Open Android Studios and select to a open project.
-
On the popup window, browse to
va-mobile-app/VAMobile/androidand select the android folder from the VAMobile project and press open.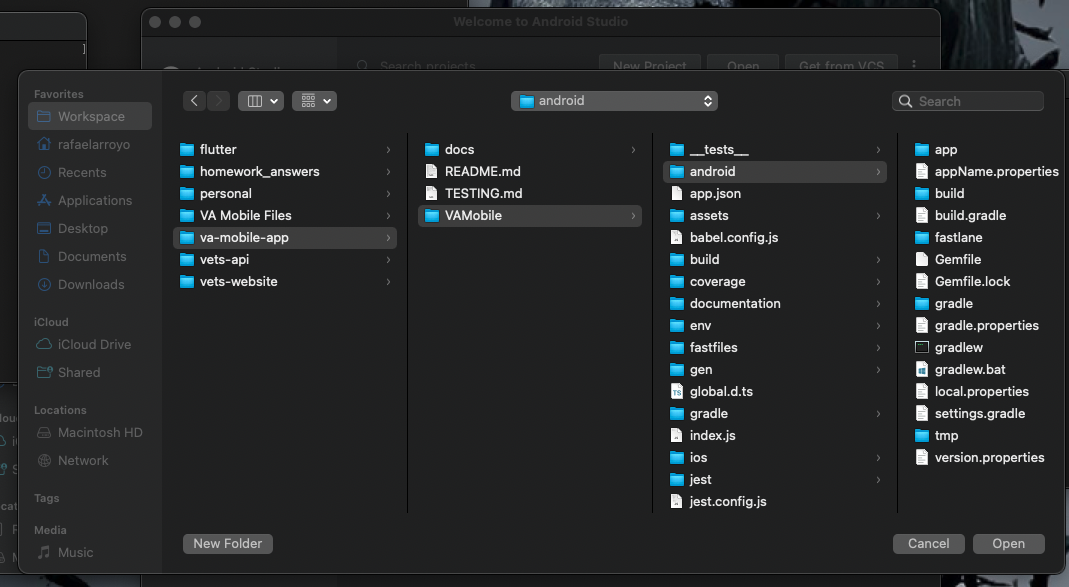
-
After opening the android project, you will need to sync the project with gradle. Go to
File -> Sync Project With Gradle Files.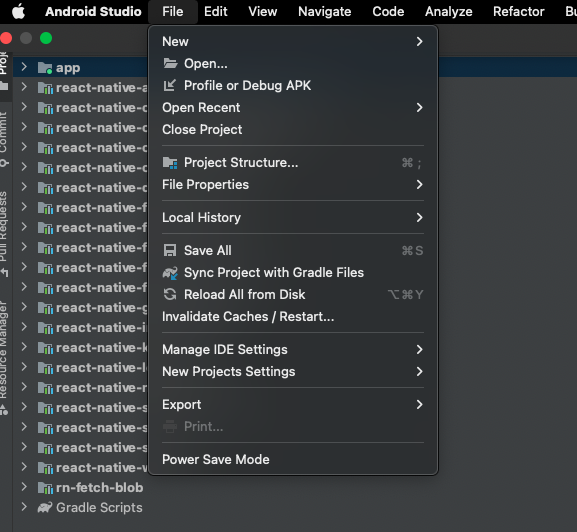
-
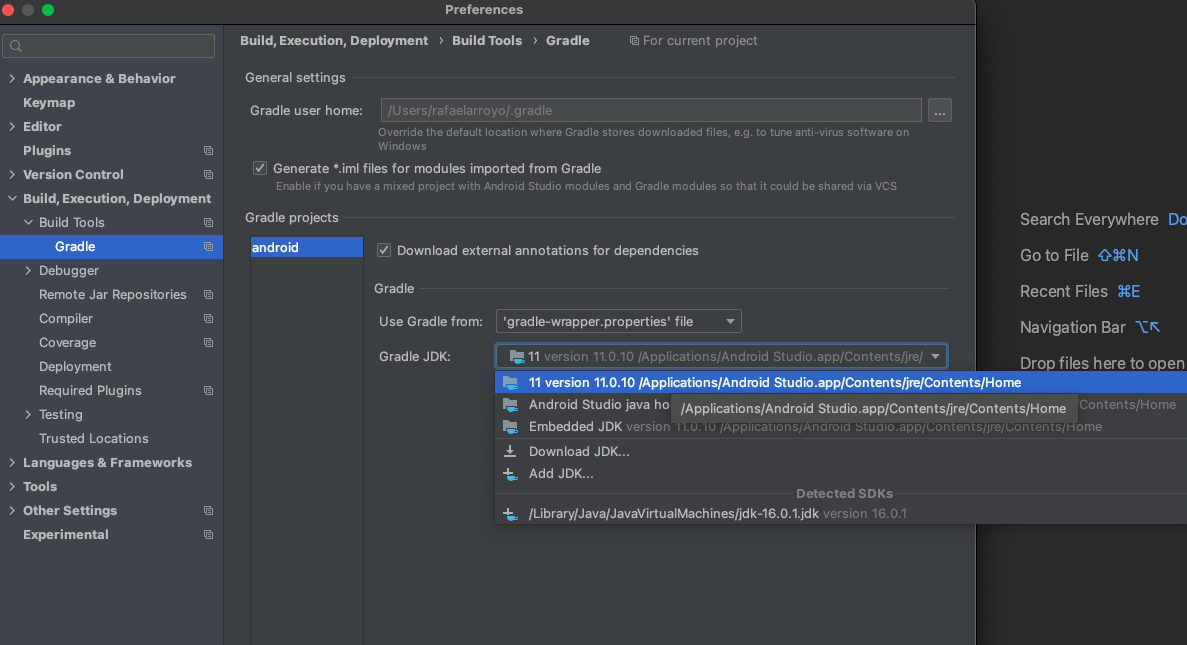
Go to
Android Studios -> Preferences -> Build, Execution, Deployment -> Build Tools -> Gradleand verify that the Gradle JDK is pointing to/Applications/Android Studio.app/Contents/jre/Contents/Home
-
Add a test emulator in Android Studios
Tools -> AVD Manager. Follow the instructions on Android Emulator Setup to add a new virtual device. -
After adding the new virtual device, select it from the top device menu.
-
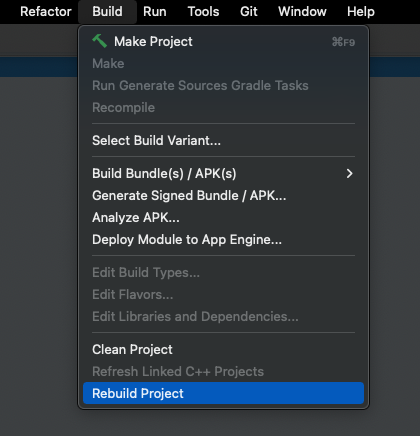
Build the project
-
Launch Virtual Device from Android studio.
-
Verify the Virtual Device launches and Android Studio installs and opens the VAMobile app on the device.
Physical Device Setup
-
Open Android Studio and select to a open project.
-
On the popup window, browse to
va-mobile-app/VAMobile/androidand select the android folder from the VAMobile project and press open. -
After opening the android project, you will need to sync the project with gradle. Go to
File -> Sync Project With Gradle Files. -
Go to
Android Studio -> Preferences -> Build, Execution, Deployment -> Build Tools -> Gradleand verify that the Gradle JDK is pointing to/Applications/Android Studio.app/Contents/jre/Contents/Home -
Turn on developer mode for the phone. See React Native Instructions
-
Connect phone with a usb to the host machine.
-
Open a Terminal and type
adb devices. You should see an ouput like so.
-
Type
adb -s <device name> reverse tcp:8081 tcp:8081.
-
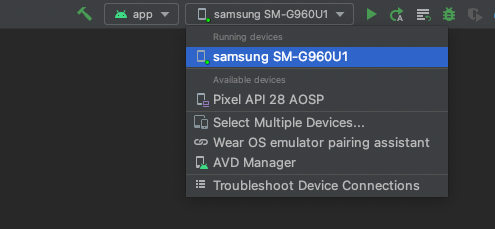
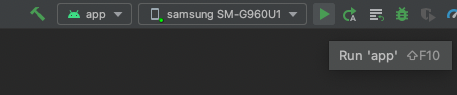
Select the physical device from the top device menu.
-
Build the project
-
Launch Virtual Device from Android Studio.
-
Verify Android Studio installs and opens the VAMobile app on the device.
iOS Setup
Simulator Setup
-
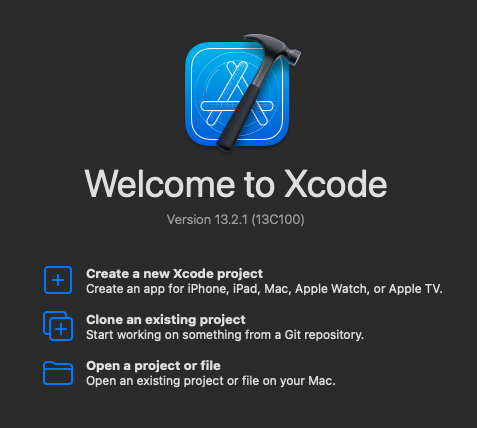
Open Xcode and select to open project or file.
-
On the popup window browse and select the
iosfolder on theVAMobileproject.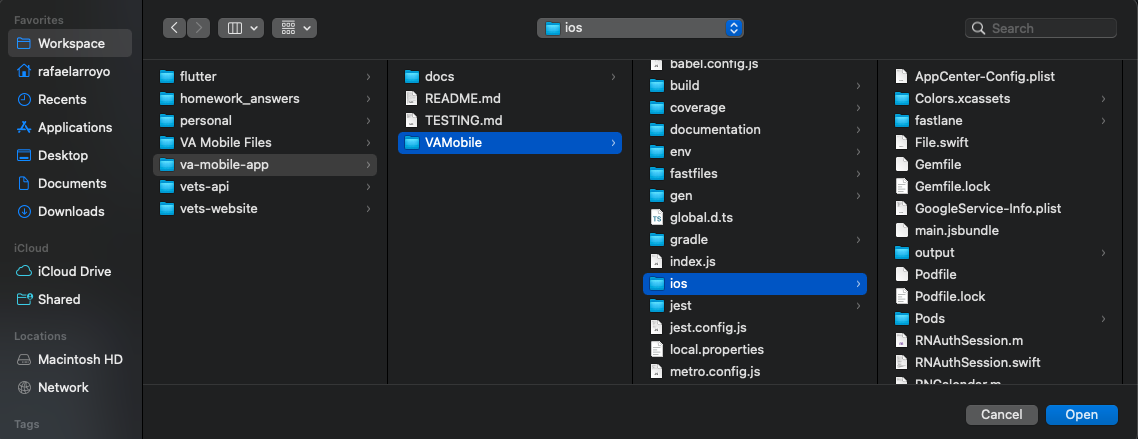
-
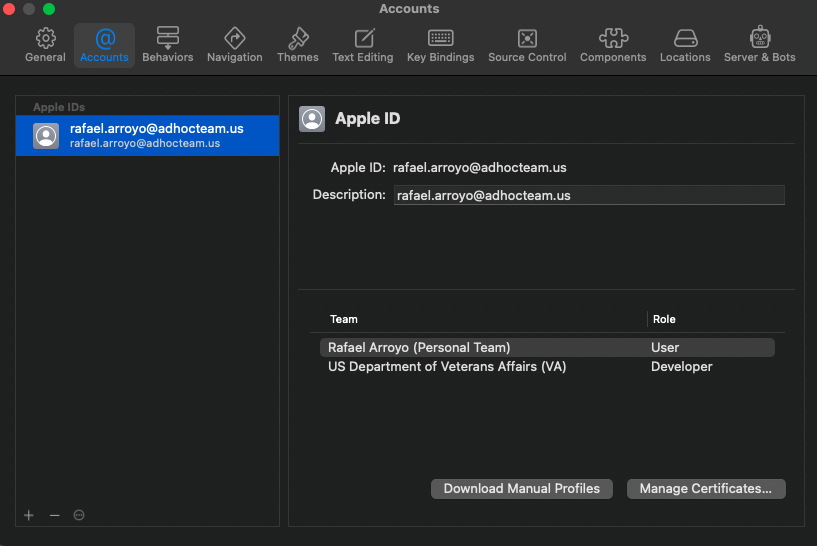
Go to Xcode -> Preference and under account verify you are signed in with the apple id which has the
US Department of Veterans Affairs (VA) developer account.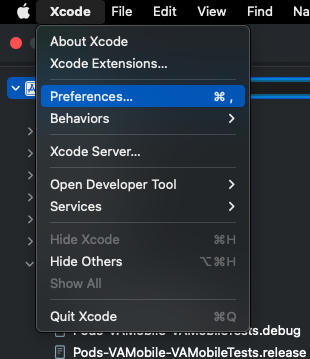
-
Select the project icon on the left hand explorer and verify you have the right signing.
Team should be US Department of Veterans Affairs (VA)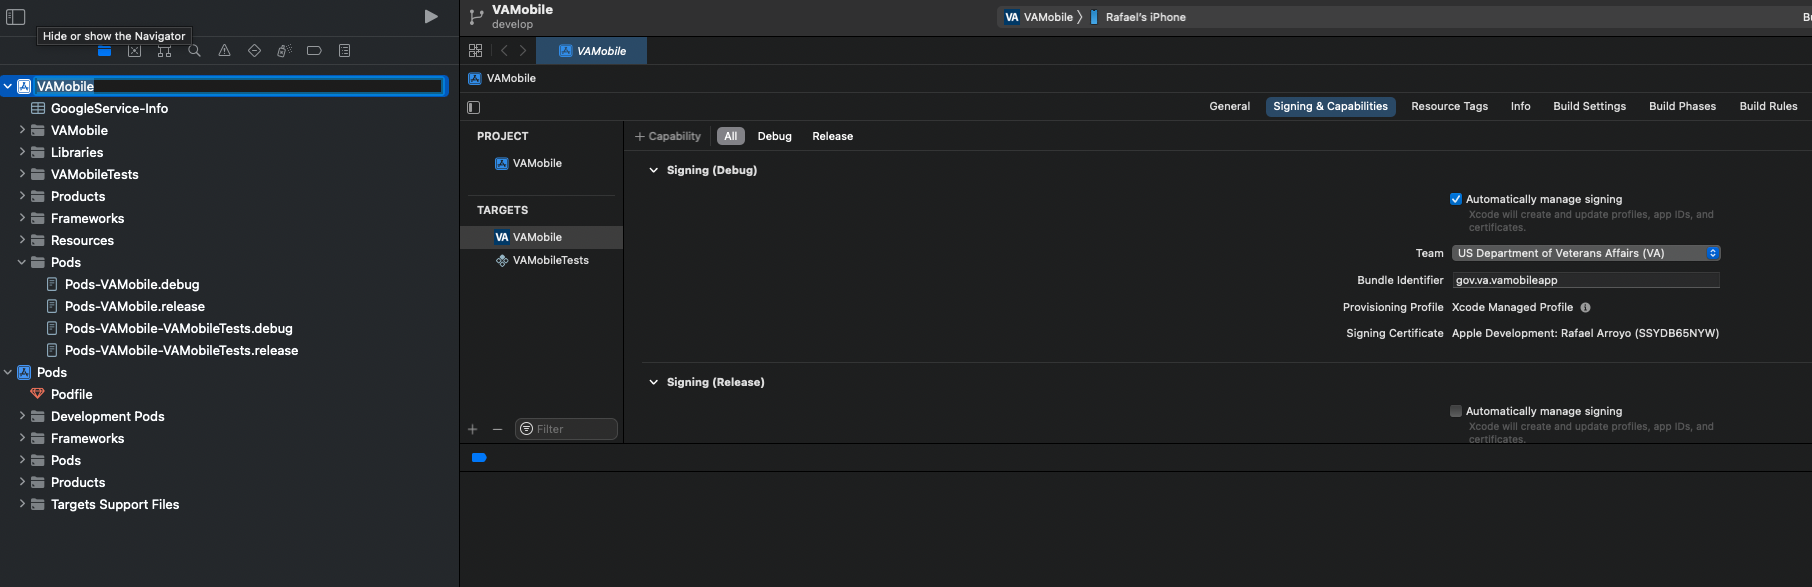
-
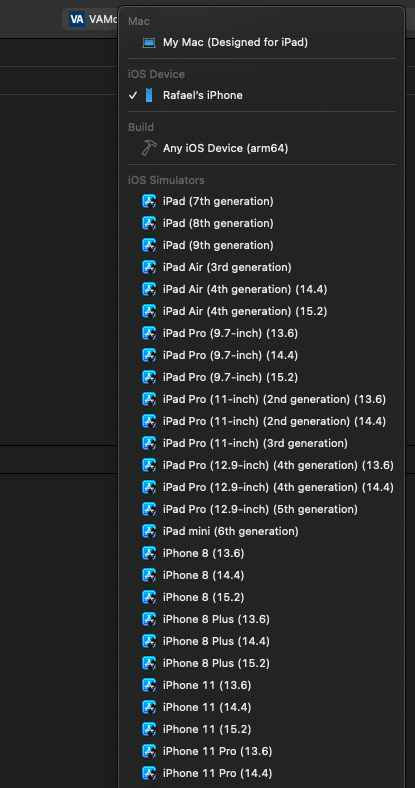
Select a simulator from the list in Xcode.
-
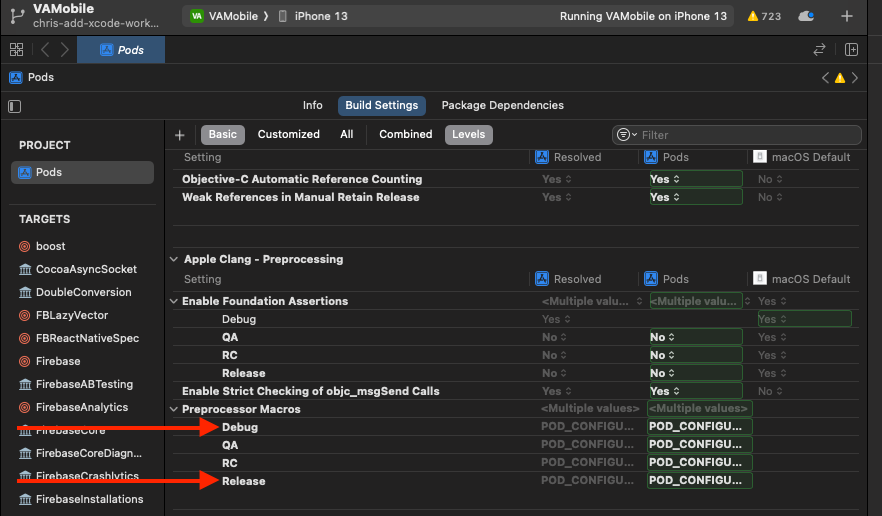
If you are using XCode 15, a temporary workaround is required to avoid a build failure with RCT-Folly.
a. Select Pods > Build Settings > Apple Clang - Preprocessing section > Preprocessor Macros section b. Add to the "Debug" and "Release" sections: _LIBCPP_ENABLE_CXX17_REMOVED_UNARY_BINARY_FUNCTION
-
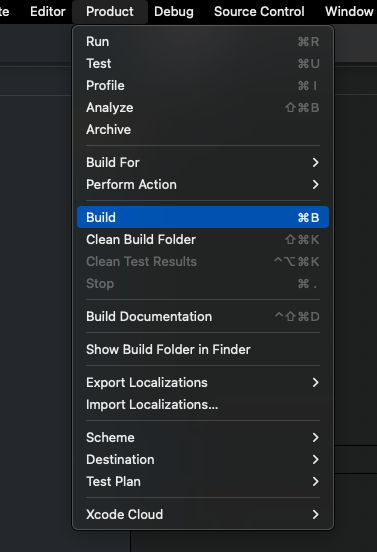
Build project on Xcode.
-
Launch simulator by pressing the play button.
Physical Device
-
Open Xcode and select to open project or file.
-
On the popup window browse and select the
iosfolder on theVAMobileproject. -
Go to Xcode -> Preference and under account verify you are signed in with the apple id which has the
US Department of Veterans Affairs (VA) developer account. -
Select the project icon on the left hand explorer and verify you have the right signing.
Team should be US Department of Veterans Affairs (VA). -
Connect the iPhone via USB to the host machine. See React Native Instructions
-
Accept permissions on your iPhone from Xcode to allow the developers option.
-
Select a device from the list in Xcode.
-
Build project on Xcode.
-
Launch device by pressing the play button.
Development Best Practices
Our team follows a set of best practices around tickets, branches, and PRs to ensure a smooth development process and high quality code. Here we'll describe the key points to keep in mind.
Tickets
We use tickets to track all our engineering work. They precisely specify the work to be performed, allow stakeholders to track progress, and guide QA in assessing the resulting work.
Creating tickets
Every ticket must contain at least the following information:
- A detailed description of the work
- Clearly specified Acceptance Criteria
- Screenshots or links to mockups where applicable
- All relevant labels ("front-end" for FE work, "Health" for Health and Benefits work, "Global" for global work, etc)
- An epic relating to the ticket's larger context
If possible, choose the relevant template for your ticket. For example, if you're creating a bug ticket, choose the Bug Report Template and include severity in the title, labels, and body.
Scoping tickets
We recommend creating smaller tickets because they are easier to implement and test. Always be on the lookout for ways to break up large tickets into smaller, more manageable pieces. Here are some strategies you can use to divide tickets:
- Instead of biting off a whole screen containing multiple components in one ticket, create a separate small ticket for each individual component.
- When you need to refactor messy code before adding functionality, create one ticket for refactoring, and another for new functionality.
- Don't expand a ticket's scope if you encounter a bug or technical debt during your work. Instead create a separate bug or code upkeep ticket to address the issue.
- For large refactoring projects, divide the work by feature (Appointments, Claims, Messaging, etc) or by category (Health, Benefits, Global).
If there's any risk that a ticket might not be completed in a single sprint, break it into smaller tickets. An estimate of 13 or larger is a clear indication that the ticket is too large.
Working on tickets
All engineering work requires a ticket.
Every ticket must satisfy the requirements in the "Creating tickets" section above. If information is missing, add it or contact the relevant stakeholders.
Before an engineer can begin work on a ticket, it must contain an estimate. Bugs get an initial estimate of 1 to cover a short investigation. Other tickets are left to the engineers' discretion, following our estimation guidelines.
Once everything is in place, complete the following tasks:
- Assign yourself
- Assign the appropriate QA engineer if not already assigned
- Move the ticket to In Progress
- Create a branch as described below in the Branches section
Then you can begin work. Keep stakeholders up to date as you work by commenting on the ticket with any important details or questions. This will also preserve information so everyone can reference it in the future.
On completion of your work, double check the following:
- All items in Acceptance Criteria are implemented
- Confirm screen reader functionality on both iOS and Android for accessibility
- Unit tests are updated or extended to cover your changes. See our Unit Tests documentation for best practices.
- Relevant documentation is updated to reflect the changes in your PR
Then create a Pull Request. See the Pull Requests section below for more information.
Branches
Feature branches are temporary branches where we develop and test new features. We implement every code change in a feature branch before merging it into the default branch.
For features that must be rolled out gradually, or where precise feature activation timing is required, use a remote config flag.
Our default branch is develop. Create your feature branch from there, named as follows:
type/ticketnumber-DescriptionOfWork
The ticket number lets us track back to the relevant ticket. The type and description show the branch's purpose at a glance. Types are feature, bug, chore, and hotfix. Description is CamelCase with optional dashes to add further details. Here are some example branch names:
feature/1234-DescriptionOfNewFeature-OptionalAdditionalInfobug/1234-DescriptionOfBugfixchore/1234-DescriptionOfChorehotfix/1234-DescriptionOfCriticalFix
After completing work in your branch, create a PR as described in "Pull Requests" below.
Sources
Pull Requests
A Pull Request (PR) is a request to merge code. All pull requests must include certain information. Each PR must pass a series of manual and automated checks before it can be merged.
Pull request process
Each pull request moves through a series of steps.
- Creation: an engineer creates a PR. See "Pull request creation" below.
- Review: a different engineer reviews the PR. See "Pull request review" below.
- Approval: when the reviewer is satisfied, they approve the PR and change the pipeline to "With QA (pre-develop)" so QA knows to begin testing.
- QA: a QA engineer tests the branch and updates TestRail. QA informs the PR creator of any issues they find. On approval, QA comments in the ticket and changes the pipeline to "Ready to merge to develop".
- Merge: the PR creater merges the PR. See "Merging pull requests" below.
- Post-merge: QA completes final testing and closes the ticket.
Pull request creation
When creating a PR, fill out each section in the PR template, including:
- Description: provide context so a code reviewer or future developer understands why the PR exists and what it does
- Screenshots: add before/after screenshots or videos showing the changes
- Testing information: confirm testing on iOS and Android. Document any special considerations like edge cases or areas of focus for QA
- Reviewer validations: tell reviewers what to check. You can usually copy the Acceptance Criteria from the ticket
- Complete all PR checklist items
Click the "Connect issue" button and choose the associated ticket. You must be logged into ZenHub to see the "Connect issue" button.
It's critical to link the PR to the ticket with the "Connect issue" button so we can track the work performed.
Hit "Create pull request" when everything is ready. If your PR is especially complex, you can annotate the PR with comments to help reviewers understand why you made particular decisions. Adding comments to large PRs can also help reviewers know where to focus their attention.
If you're still actively working on your branch, create a draft PR. Move the PR out of draft status when it's complete and ready for review.
GitHub Actions automatically runs linting checks, unit tests, and E2E tests on PR creation. Fix any issues surfaced by these checks. Revert the PR to draft status if you need more time to make fixes.
When all the checks pass, your PR is ready for review.
Pull request review
At least one review is required on every PR. Here are some guidelines for creating and reviewing PRs.
As a PR creator:
- Try to keep PRs under 400 lines. The larger the PR, the more difficult it is to review thoroughly.
- If a reviewer asks questions, add a comment under each question with your answer.
- If a reviewer requests changes, implement them or explain why you disagree.
- If no one reviews your PR within 24 hours, request a review on Slack.
As a PR reviewer:
- Be as precise and clear as possible in your comments. Explain why you're requesting each change.
- Target your feedback towards best practices. Avoid matters of opinion.
- If you're just commenting and not requesting changes, keep things moving by approving the PR or saying something like "leaving approval to (person) because I don't know enough about this code".
- If you find some code confusing or hard to understand, mention it. Other engineers will probably feel the same way.
- Provide constructive feedback in a calm, civil manner. We're all working together to make the app better.
- Spread positivity by calling out clean, maintainable code, good documentation, etc.
Merging pull requests
You can merge your PR after QA approves it. Choose the "Squash and merge" option to squash your commits down to a single commit in the base branch.
You can choose to preserve all your commits if they contain critical information. However, squashing is usually preferred to avoid clutter.
Format the commit message using the Conventional Commits specification:
<type>[optional scope]: <description>

[optional body]

[optional footer(s)]
Example commit messages:
feat: add analytics to cerner alerts
fix: preserve whitespace in secure messages
chore: run compression over all app store images
docs: add a new, nested page under research
You can use ! to denote breaking changes:
chore!: upgrade React Native to 0.73
After merging:
- Change the pipeline on your ticket to "With QA (develop)" so QA can perform final testing
- Select the current release under "Releases" so we can track which tickets went into each release